商品編集画面の便利な機能 ID:9467
登録した商品の編集画面で項目の並び順を変えたり、使わないメニューを非表示にすることが出来ます。
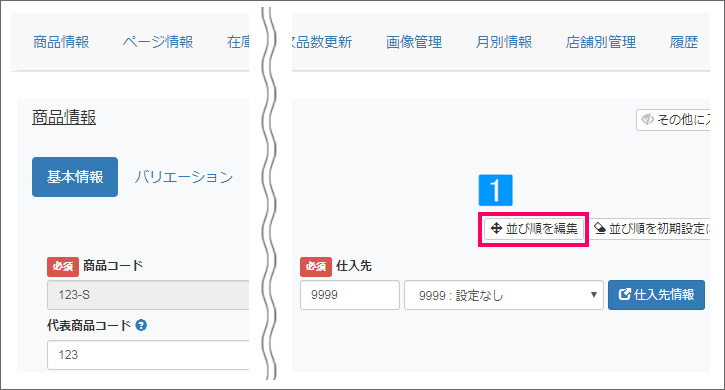
1.項目の並び順を変える
【本システム画面】
- 並び順を変更したいタブを開き、[並び順を編集]をクリック
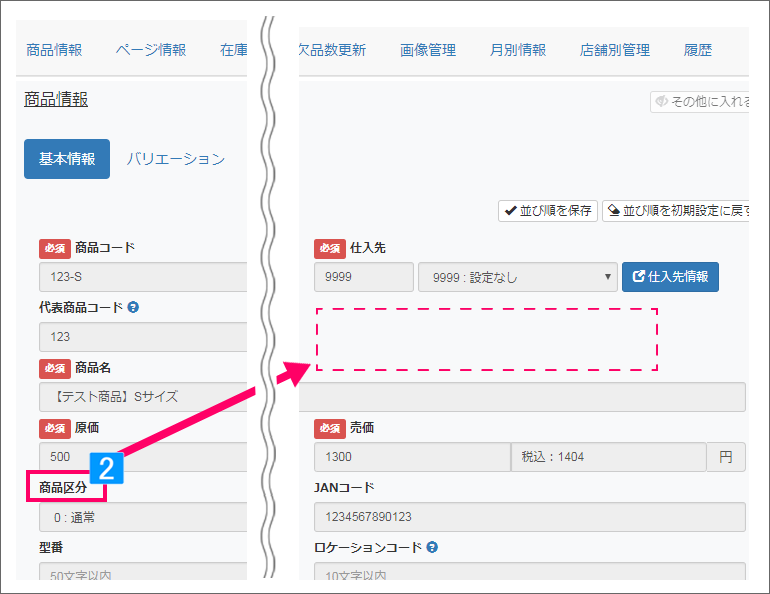
- 該当の項目をドラッグ&ドロップで移動する
※変更したい項目の名称を左クリックしたまま、移動場所まで動かしてください。
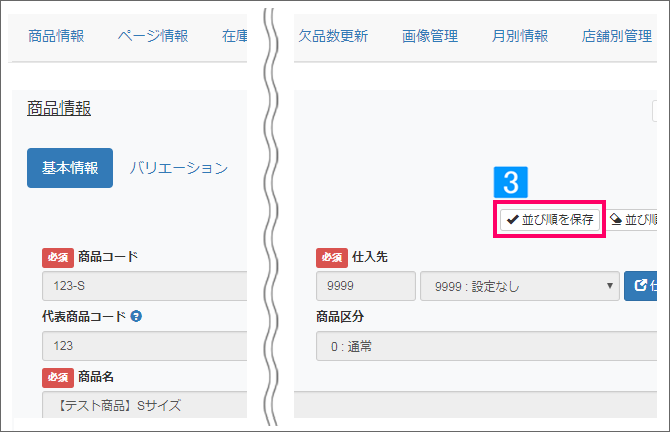
- [並び順を保存]をクリック
↓
変更した並び順が保存される
2.項目の並び順を初期値に戻す
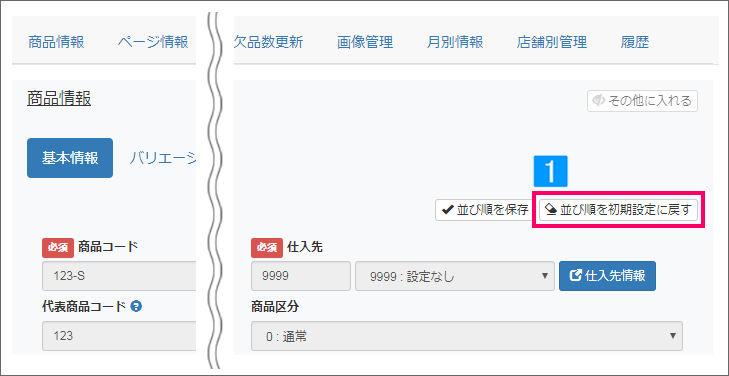
- [並び順を初期設定に戻す]をクリック
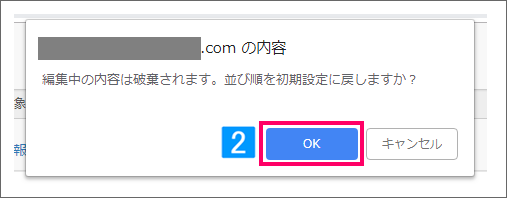
- [OK]をクリック
↓
並び順が初期設定値に戻る
3.使わないタブを[その他]に入れる

- 該当のタブを開き、[その他に入れる]をクリック
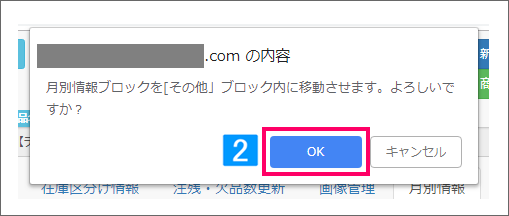
- [OK]をクリック
↓
該当のタブが[その他]に移動する
4.[その他]に入れたタブを戻す
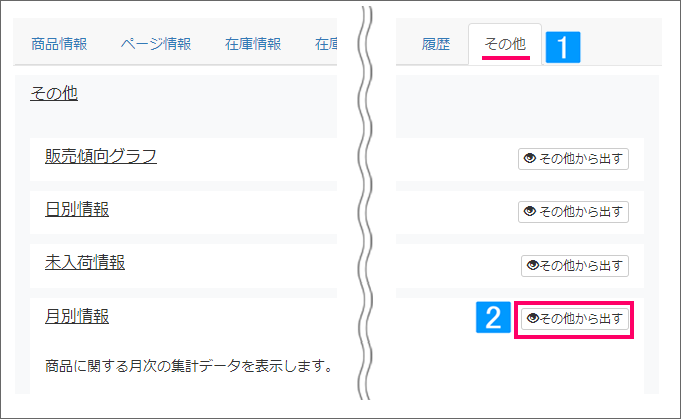
- [その他]タブをクリック
- 該当のタブ名の[その他から出す]をクリック
↓
該当のタブが上部に表示されます
